Sep 30: Graphics, GUI components, Listeners, Callbacks
- Graphical Applets
- Design pattern: the template pattern
- AWT and Swing
- GUI Components
- Events and Listeners
Code discussed in lecture
Graphical Applets
So far we have considered only applications. Another choice is to write an applet that appears as part of a web page. Rather than worrying about who has which browsers and all the incompatibilities that this causes, we will use a program called AppletViewer instead. But applets are different from programs. They have nomain, for
example, because they are intended to run under a web browser.
This style of programming is new to you. So far, when you have
written Java programs, you have written the main method
and some of the methods it calls. And maybe some of the methods
they call. And so on, but eventually you get down to methods
that are supplied with the Java system, such as
System.out.println, methods of the
DecimalFormat class (e.g., the DecimalFormat
constructor and format), or methods of the
String class (e.g., length).
So you write the higher-level methods and the Java system supplies lower-level ones.
The Java-supplied methods do not call methods we write. It
seems obvious that the Java-supplied methods couldn't call the methods
we write, because how would someone we've never met who wrote the
Java-supplied methods know what methods we write?
When you write an applet, you don't create a main method.
More precisely, there is a main method, but you don't
have to write it. It's provided by the AppletViewer (or whatever is
running your applet). Yet, the AppletViewer does expect certain
methods to be in your program, and it will call them. It uses default
versions of these methods in case you don't provide them, but these
default methods usually don't do anything.
Here's one way to think of this setup. You have created plenty of
programs that called methods you didn't write, such as
System.out.println. These methods were supplied by
someone/something else, and you expected them to be there. Well, with
applets, the situation is reversed: whoever wrote the AppletViewer
will call methods that he or she didn't write, but that you will
provide.
Just to complete the circle, the methods that you include in your applet may include calls to other methods that you did not write but were supplied with the applet software. So here's the picture for an applet, with methods on a shaded background being supplied with Java:
Design pattern: the template pattern
Architects discovered that certain problems arise again and again in the design of buildings, and that certain solution approaches can be used to solve them. A trivial example: Problem - a room needs light. Possible solution approach: install light fixtures. Another possible solution approach: add windows or skylights. Each of these possible solutions is a design pattern. Note that a design pattern is not a design. It does not tell you how many light fixtures or windows are needed and where to put them. It is an approach that often leads to a successful design.
In 1977 Christopher Alexander collected a number of these patterns and wrote about them. Ten years later Kent Beck and Ward Cunningham wrote a paper describing their experiments in applying design patterns to CS design problems. In 1995 Gamma, Helm, Johnson, and Vlissides (known as the Gang of Four) published a book entitled Design Patterns: Elements of Reusable Object-Oriented Software. It gives dozens of design patterns. Our textbook discusses software design patterns on p. 64, and lists over a dozen patterns that appear later in the book.
One of these design patterns is the template pattern. A program
is written to solve a problem, e.g. performing the necessary display and other
operations needed for an applet. However, low-level
details (e.g. what is to be displayed) are not supplied.
The high-level code is the template, and the low-level details are supplied by
method calls to functions that have not been written or are simple default methods
that usually do nothing. In our case we will extend the class JApplet,
which supplies the template. We will then override certain methods including
init (which allows you to initialize variables, sort of like a constructor).
AWT and Swing
AWT and Swing are toolkits for producing Graphical User Interfaces (GUIs). The AWT (Abstract Windowing toolkit) was included in the original Java language. It was designed to be multiplatform, so that Windows, Mac, UNIX, and other operating systems would all be able to use it without modification. The idea was "write once, run anywhere." AWT was designed to use the buttons, windows, etc. that were supplied by the platform, however. GUIs that looked good on one platform would appear a bit different on other platforms, causing problems. The result was, "write once, debug everywhere."Swing is a newer windowing toolkit originally introduced as a standard extension to Java 1.1 (thus the name javax.swing, with the "x" for extension). It became a standard part of Java 2, and it continues on in the current release of Java. Instead of using native buttons, etc., it paints its own, making things a bit slower but more uniform across platforms.
We can use both AWT and Swing, giving us at least two ways to do
pretty much everything. The Swing versions of classes start with a
"J" (so that JButton is from Swing, whereas
Button is from AWT). Swing is considered to be more
powerful and flexible, so we will usually use it. However, some drawing
commands and other methods only appear in AWT. We will
use AWT for these methods and Swing for providing most of the GUI.
Unfortunately, even Swing is not quite "write once, run everywhere." Those of you using Mac OS X will quickly come to recognize the problem, because the Aqua interface overrides some of the properties that you try to assign to your GUI via Swing.
We will barely scratch the surface of AWT and Swing. They are huge, with hundreds of classes and more methods than anyone understands. Fortunately we can learn a few useful ones and several general principles which will let you learn new information as needed.
This is a good time for a digression on packages. Java has a huge library.
It is useful to group classes into groups that do the same sort of thing.
These groups are called packages. One example is
AWT (full package name java.awt), which contains all of the AWT classes, and
Swing (full package name javax.swing) which contains the Swing classes.
The names and dots actually correspond to a file structure. There is a
directory (folder) named java, and within it is a subdirectory
named awt. All of the code for the AWT classes in in that
subdirectory.
To put a class in a package you simply add "package packagename"
as the first statement of the file defining the class. If you don't do that,
you are automatically added to the default package. We will do things with
packages later in the term.
GUI Components
A component is anything that occupies visual space on the window: buttons, menus, text fields, scroll bars, and so on. We will also see how to create a "canvas" component that we can draw on.
Components are added to containers. We add a GUI
component to a container by calling the add method.
A JApplet has a content pane, which
is the primary container for the applet. The JApplet
class has a method getContentPane, which returns a
reference to Container. We'll see it in use in a moment.
For now we will have only one component to add to the content pane: a drawing canvas. Soon we will learn how to add lots of components and lay them out esthetically on the applet window.
SimpleApplet
Applets are designed to run on web pages. In that case you need to supply an HTML file. However, for development is is simpler to use an AppletViewer program, and this is what we do. When we run an applet under Eclipse we can dispense with the need for an HTML file. We need only a Java file.
SimpleApplet.java shows such a Java file.
It must have the two import statements. These statements allow us
to refer to classes without giving their full names. The full name would
include the package name and class name. (See p. 47 in the text for more details.)
If we left out the import statement the class header for SimpleApplet
would have to be:
The first import statement
imports all the classes in the package awt. (The "*" says
to import all classes.)
The second imports all classes in the package
swing, which includes the class JApplet. We then
define a class SimpleApplet, and it is declared as
extends JApplet.
The first line of the applet is a delaration of the variable
serialVersionUID. The whole purpose of this variable is to
avoid a warning message. If you leave it out, Eclipse will give a yellow
triangle warning. If you click on it, it will offer to supply the default
declaration that you see in the code. For this course this will be all
that you need to know about that variable.
The method that we override in the JApplet is init. It
is called when the applet begins. This
is where we intialize all of the things that the applet needs. We can also set the
size with setSize, giving it the width and height of the applet
window. (The default is 100 x 100 pixels.)
We then get the content pane of the JApplet and add a Canvas object to it. This is the drawing canvas.
Finally, call setVisible(true) in order to make the applet
show up on the screen by calling the method paint.
Canvas is an inner class. It extends JPanel. We will use
JPanel objects for two purposes in this course. The first is as a container.
For instance, we will add several buttons to a JPanel
and then add the JPanel to the the content pane of a JApplet.
The other is as a canvas to be drawn on, and that is how we use it here.
The method that we override in this class is paintComponent.
The parameter is a Graphics object. The
Graphics class comes as part of the AWT. A
Graphics object represents the window in which we draw;
its instance variables are hidden from us, but it has a plethora of
methods by which we can interact with the window. (See the Graphics
class on the Java documentation site to see all of them.) This page has its
origin at the upper-left-hand corner, and it has integer coordinates
to identify pixels. The x-axis
increases from left to right (as you're probably used to), but the
y-axis goes down as the y values increase. (You're probably
used to the y-axis going up as y increases from your math courses. In
computer graphics, it is customary to have the y-axis go down, so that
the origin is the upper-left-hand corner.) We have seen this already
in our image-processing code.
Graphics object like page the graphic is drawn
onto the page. The line
Graphics object that page
references to draw the given String starting at (30, 30)
and extending to the right. The point (30, 30) is the left end of the
string's baseline. Characters are drawn with their bottoms touching
the baseline, except for characters such as "y" and "g" that have
descenders that go below the baseline.
Whenever you override paintComponent, the first line of the
call should always be a call to super.paintComponent. This lets
the component that contains this component do its drawing. In particular this
containing component
fills in the background, which erases what was there before. Then you can draw
over it.
When an applet becomes visible it draws itself. If an applet
window is resized or (partly) covered and then uncovered the applet will re-draw
itself. The way it does this is by calling the method paint.
paint calls several other methods, including paintComponent,
a method to draw borders, and a method to paint sub-components of this component.
(So calling paint on the JApplet will automatically call
paint on each component in its content pane.)
You should never override paint. Were you to do so, the other
calls would not be made. (Those of you who took
CS 5 will find this strange, because with Applet you did override
paint. With JApplet that can cause problems.)
Sometimes we draw something new and want it to appear on the screen. The way to
get the applet to redraw itself is to call repaint. This method eventually
calls paint, but it does other things as well. You should never
call paint directly.
Running an applet
To run an applet, we create a Java file and add it to a project, just as with an application. When we select "Run as" in the "Run" menu, however, we then select "Java Applet" in the cascading menu that appears.
DrawAMac
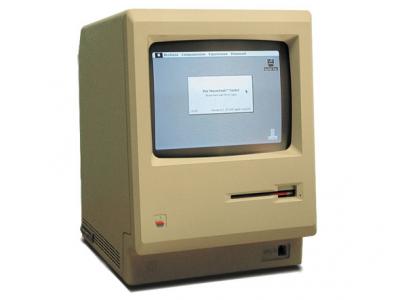
To create our own applets, it is easiest to start with SimpleApplet.java and then modify it. Here, we'll create an applet namedDrawAMac, which draws a Mac (the original,
mid-1980s style of Mac):
DrawAMac.java implements the
DrawAMac class. It has the same basic structure as
SimpleApplet.java. After the import statements, it
declares the DrawAMac class, saying that it
extends the JApplet class. It has an
inner class (called DrawAMacCanvas this time, although
Canvas would have worked just as well). This class
implements a paintComponent method. As before, the parameter
page holds a reference to a Graphics object
when paintComponent is called by the applet.
The method setColor sets the drawing color to the color
passed as a parameter. Everything drawn will be in that color until
the drawing color is changed by a subsequent call to
setColor. The default drawing color is black. Why the
Color. in front of the word blue? This says
that blue is a color constant defined in the class Color.
We're not using it in the DrawAMac class, but there is a
drawRect method, which is passed four integer parameters:
the (x, y) value of the upper left corner, the width of the rectangle,
and the height of the rectangle. The drawRoundRect
method, which we do use in DrawAMac, is passed those four
parameters and two additional ones: the width and height of the arc
that rounds out the corners.
The same methods with the word "fill" replacing "draw" result in the
interior of the object being filled in instead of the outline drawn.
Again, the object is filled with the current color, given by the most
recent setColor call. The fillOval method
is passed the same four integer parameters as drawRect,
and it draws the filled oval whose bounding rectangle is given by the
parameter values.
The other method used is drawLine. This method takes
four parameters: the (x, y) coordinates of the start point and the (x,
y) coordinates of the finish point.
PsychBoxes
PsychBoxes.java demonstrates the use of the switch statement and of a timer to animate the applet. The idea is to draw 55 nested boxes, rotating through four different colors. Then the boxes are redrawn, with the colors shifted over one position. This action is repeated forever, leading to a psychedelic effect in which the boxes seem to move.Note that to stop this program you have to quit it (from a menu or by keystrokes or by clicking the "close" button on the window), because it runs forever.
The switch statement has an expression that evaluates to an integer value from 0 to 3. The switch is followed by a sequence of cases enclosed in curly brackets. Each case has a value, and execution jumps to the case that matches the value of the expression. If no case matches, and a default case has been defined, then the default case is executed, and control passes to the statement after the switch otherwise.
Unfortunately, execution does not stop at the end of a given case unless a break statement is put there. A break causes control to go to the statement after the switch. Forgetting a break is a common pitfall. The "fall-through" to the next case can occasionally be useful, but is more often a pain in the neck. Java inherited this bizarre syntax from C++, which in turn inherited it from C.
Here, we use the switch statement just to select a color. Then we
call drawRect to draw a single rectangle in the given
color. By cycling through the colors to choose the color in which
each rectangle is drawn each time we draw all the rectangles, we get
the illusion of the rectangles converging toward the center of the
window.
This example uses a class known as Timer. Think of a
Timer as an alarm clock that goes off at
periodic intervals and causes something to happen. Here, it goes off
every 100 milliseconds, or every 1/10th of a second. Each time that
the Timer goes off, it calls the method
actionPerformed. This method increments the variable
iter, which takes us to the next set of colors in the
cycle, and then calls repaint. The call to
repaint then calls
paint, which calls paintComponent on the
PsychBoxesCanvas object. It is the
paintComponent method that ends up
drawing the 55 boxes every 100 milliseconds.
How does the Timer know to call the actionPerformed
method of the PsychBoxes class? The answer is that this
was passed as the second parameter of the Timer constructor. That
parameter must be of type ActionListener. ActionListener
is an interface with a single method: actionPerformed. Thus the
timer class knows that whatever object is passed to it has an implementation of this
method. It simply calls it every time that the timer goes off.
This is another example of another design pattern, the strategy pattern.
The timer does not know what is supposed to happen when the timer goes off. Therefore
we supply an object that does know. The "strategy" for what is to happen is
encapsulated in the object. If we supply a different object with a different
actionPerformed method the result of the timer going off would be
different. From the timer's point of view, it simply calls actionPerformed
on the object passed to it and it depends on that object to know what the desired
behavior is.
Events and Listeners
How can we get our applet to do something, such as respond to a mouse click? We will use the same idea that worked forTimer.
The answer has two parts:
- We have to create an object with a method to handle a specific
type of event. The generic name for such an object is a
listener.
- We have to inform the Java runtime system that this listener object contains a method that should be called every time an event of the type we are interested in occurs. Java will maintain a list of these listener objects for each type of event that it knows about. When an event of some type occurs, it will run through its list of objects for that event and "inform" each of them by calling the method to handle that event that they supplied. (Note that there can be multiple listeners for a certain event, and also that one listener can listen for many different events.)
We tell Java that we want to be informed when a certain event occurs
by calling a method to add the listener object to the list of
listeners for a particular event. If we indicate an event name by
XXX, then the addXXXListener method takes
care of this. The object passed must implement the
XXXListener interface. Of course, in a real program, we
replace XXX by an event name. For example, we are about
to see the MouseListener interface and the
addMouseListener method, so XXX would be
replaced by Mouse.
Mouse events and the MouseListener interface
One of the most common events to respond to is a mouse click. Java
provides a set of events that are jointly called a
MouseEvent:
- Mouse pressed
- The mouse button is pressed down.
- Mouse released
- The mouse button is released.
- Mouse clicked
- The mouse button is pressed down and released without moving
the mouse in between.
- Mouse entered
- The mouse cursor moves into the window from outside the window.
- Mouse exited
- The mouse cursor moves out of the window from inside the window.
MouseEvent is created and passed to a method designed to
handle that event, if one has been "registered" with the component.
The applet ClickAMac.java illustrates the
process. It chooses to have the applet itself implement the
MouseListener interface, by stating so at the end of the
declaration of the class ClickAMac. The interface
requires five methods. One of these, mouseClicked, is
actually given code. The other four have empty bodies. When these
empty-body events occur, the appropriate method is called, but it
returns after doing nothing, ignoring the event.
The program allows the user to click the mouse and then draws a Mac
where the mouse was clicked. Let's see how this happens. We have an
instance variable clickPoint, which is a reference to a
Point object and is initialized to null. A
Point is a builtin Java class. It has two instance
variables, x and y, which are public rather
than private. Therefore if p references a
Point object, then p.x is the point's
x coordinate and p.y is its y
coordininate. The Point class provides a convenient way
to package together x and y coordinates.
The init method has the statement
addMouseListener(this). This statement registers the the
ClickAMac object as one of the objects that listen for
mouse clicks in the applet. When a mouse click occurs, the method
this.mouseClicked will be called to deal with it. That's
how the code we write to handle events gets called. The rest is similar
to SimpleApplet.
The paintComponent method simply calls drawAMac if
clickPoint is not null. This
drawAMac method contains code that we saw before, but
packaged up in a method with all the drawing relative to a
Point passed to it, which is the location of the upper
left corner of the Mac to be drawn.
At first glance it appears that nothing else will happen. The
init method is called when the applet starts, and the
paint method is called once, but it does not appear that
anything else will happen. And it won't—at least not until the
user does something with the mouse in the applet. Then the Java
runtime system will run through its list of objects that listen to
mouse events. It will call all of the relevent methods (out of
mousePressed, mouseReleased,
mouseClicked, mouseEntered, and
mouseExited) on each such object, passing each one of
these methods a reference to a MouseEvent object. Part
of the information saved in the MouseEvent object is the
point where the mouse was clicked. If you read about the
MouseEvent class on the Oracle Java
website (look for MouseEvent in the pane whose header
reads "All Classes"), you'll see that we can also get the x- or
y-coordinate, the number of clicks that occured (so that we can
detect a double or triple click), and other things that we won't worry
about now.
For our ClickAMac object, when the mouse is clicked, Java
calls the mouseClicked method, passing it a
MouseEvent object. This method uses the
getPoint method to get the point where the mouse was
clicked and saves it in the instance variable clickPoint.
It then calls repaint, which causes the Mac to be
drawn, with clickPoint supplied as the upper left corner
of the Mac. This process is repeated every time the user clicks the
mouse in the window.
Recap
Let's recap how the applet in ClickAMac.java works:- When the applet runs, the AppletViewer creates a
ClickAMacobject and runs itsinitmethod. - The
initmethod "registers" thatClickAMacobject as a listener for mouse events by callingaddMouseListener(this). (Recall thatthisis a reference to the object on which the method is invoked. Here, it is a reference to theClickAMacobject.) - The
ClickAMacobject has an instance variableclickPoint, which is a reference, initiallynull, to aPointobject. APointobject exists to package togetherxandyvalues, both of which are public instance variables. - Because the
ClickAMacclassimplements MouseListener, it promises to have implementations for the methodsmouseClicked,mousePressed,mouseReleased,mouseEntered, andmouseExited. It does provide these implementations. All exceptmouseClickedhave empty bodies, and so they do nothing when called. - At this point, the applet just waits for something to happen.
Even though
paintComponentwas called when the applet became visible, it didn't draw anything. The instance variableclickPointwasnull. - When one of the mouse events occurs, the part of the Java
system that looks for mouse events runs through its own list of
objects that have "registered" as caring about mouse events.
This
ClickAMacobject is one such object. The Java system, therefore, calls the appropriate method in this object. For the four mouse events other than a click, the appropriate method does nothing. But if the event was a mouse click, the Java system calls themouseClickedmethod. - When the Java system calls
mouseClicked, the parameter passed is a reference to aMouseEventobject namedevent. By callingevent.getPoint(), themouseClickedmethod gets a reference to aPointobject that gives the location of the mouse at the time of the click. -
mouseClickedsaves this reference in the instance variableclickPoint. It then callsrepaint. -
repaintcallspaint(and does some other stuff). -
painteventually callspaintComponentin theClickAMacCanvasobject in the content pane of the applet.paintComponentfirst checks whetherclickPointisnull. Of course it isn'tnull, because we just stored into it.paintComponentthen callsDrawAMac, giving it the referenceclickPointto aPoint. -
DrawAMacdraws the Mac, with its top left at the location of thePointit is given.
The addMouseListener method
If you understand what's going on here, and if you understand
interfaces, then it won't surprise you that the
addMouseListener method has the following header:
MouseListener interface. That's why in
ClickAMac, we can call
addMouseListener(this) from the applet's
init method: the ClickAMac class does indeed
implement the MouseListener interface.